- Overview
- Documents
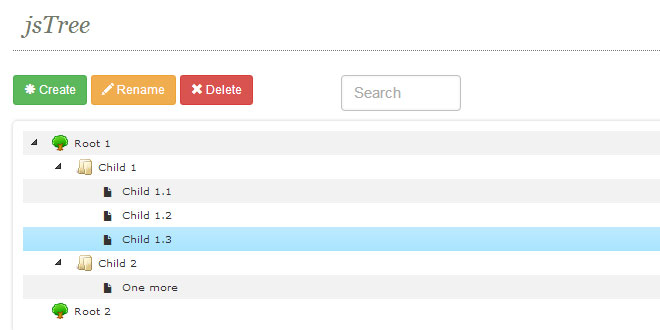
jsTree is jquery plugin, that provides interactive trees. It is absolutely free, open source and distributed under the MIT license. jsTree is easily extendable, themable and configurable, it supports HTML & JSON data sources and AJAX loading.
jsTree functions properly in either box-model (content-box or border-box), can be loaded as an AMD module, and has a built in mobile theme for responsive design, that can easily be customized. It uses jQuery's event system, so binding callbacks on various events in the tree is familiar and easy.
Just a few of the features worth noting:
- drag & drop support
- keyboard navigation
- inline edit, create and delete
- tri-state checkboxes
- fuzzy searching
- customizable node type
Source: jstree.com
1. INCLUDE CSS AND JS FILES
<link rel="stylesheet" href="dist/themes/default/style.min.css" />
<script src="dist/libs/jquery.js"></script>
<script src="dist/jstree.min.js"></script>
2. HTML
<div id="jstree">
    <!-- in this example the tree is populated from inline HTML -->
    <ul>
      <li>Root node 1
        <ul>
          <li id="child_node_1">Child node 1</li>
          <li>Child node 2</li>
        </ul>
      </li>
      <li>Root node 2</li>
    </ul>
  </div>
3. JAVASCRIPT
$('#jstree').jstree();
-
Listen for events
jsTree uses events to notify you when something changes while users (or you) interact with the tree. So binding to jstree events is as easy binding to a click. There is a list of events and what information they provide in the API documentation.
$('#jstree').on("changed.jstree", function (e, data) { console.log(data.selected); }); -
Interact with your instances
Once an instance is ready you can invoke methods on it. There is a list of available methods in the API documentation. The three examples below do exactly the same thing
$('button').on('click', function () {
  $('#jstree').jstree(true).select_node('child_node_1');
  $('#jstree').jstree('select_node', 'child_node_1');
  $.jstree.reference('#jstree').select_node('child_node_1');
});
4. CONFIGURATION
Creating an instance as described in the overview does not modify any of the defaults:
$('#jstree').jstree();
You can change the defaults for all future instances:
$.jstree.defaults.core.theme.variant = "large";
$('#jstree').jstree();
But most of the time you will want to change the defaults only for the instance that is being created. This is achieved by passing in a config object when creating the instance:
$('#jstree').jstree({
  "plugins" : [ "wholerow", "checkbox" ]
});
As seen in the previous example - there is one special key in the config object named plugins. It is an array of strings, which contain the names of the plugins you want active on that instance.
All options that do not depend on a plugin are contained in a key of the config object named core, the options for each plugin are contained within a key with the same name as the plugin:
$('#jstree').jstree({
  "core" : {
    "themes" : {
      "variant" : "large"
    }
  },
  "checkbox" : {
    "keep_selected_style" : false
  },
  "plugins" : [ "wholerow", "checkbox" ]
});
You can have a look at all the options and their default values. This list is what you can configure on each instance.
For example, by default the tree allows multiple selection as stated in $.jstree.defaults.core.multiple, to overwrite that make sure your config object contains "core" : { "multiple" : false }. If you have multiple overrides for the same key (like "core" here), group them:
$("#jstree").jstree({
  "core" : {
    "multiple" : false,
    "animation" : 0
  }
});
5. JSON DATA
The format
jsTree needs a specific format to work with JSON. In the standard syntax no fields are required - pass only what you need. Keep in mind you will be able to access any additional properties you specify - jsTree won't touch them and you will be able to use them later on.
To change the icon of the node use the icon property. Specifying a string containing a / will display that image as the node icon. Using any other string will apply that class to the <i> element that is used to represent the icon. You can use boolean false to make jsTree render the node with no icon.
You can set the state on a node using the state property. Use any combination of the following: opened, selected, disabled.
Both li_attr and a_attr are passed directly to jQuery's attr function.
When using AJAX set children to boolean true and jsTree will render the node as closed and make an additional request for that node when the user opens it.
Any nested children should either be objects following the same format, or plain strings (in which case the string is used for the node's text and everything else is autogenerated).
// Expected format of the node (there are no required fields)
{
  id          : "string" // will be autogenerated if omitted
  text        : "string" // node text
  icon        : "string" // string for custom
  state       : {
    opened    : boolean  // is the node open
    disabled  : boolean  // is the node disabled
    selected  : boolean  // is the node selected
  },
  children    : []  // array of strings or objects
  li_attr     : {}  // attributes for the generated LI node
  a_attr      : {}  // attributes for the generated A node
}
Alternative JSON format
If you do not want to use the nested children approach, you can use the alternative syntax where each node object has two required fields:id & parent and no children property (everything else remains the same).
jsTree will automatically build the hierarchy. To indicate a node should be a root node set its parent property to "#".
This should be used mainly when you render the whole tree at once and is useful when data is stored in a database using adjacency.
// Alternative format of the node (id & parent are required)
{
  id          : "string" // required
  parent      : "string" // required
  text        : "string" // node text
  icon        : "string" // string for custom
  state       : {
    opened    : boolean  // is the node open
    disabled  : boolean  // is the node disabled
    selected  : boolean  // is the node selected
  },
  li_attr     : {}  // attributes for the generated LI node
  a_attr      : {}  // attributes for the generated A node
}
Using JSON
To populate the tree with a JSON object you need to use the$.jstree.defaults.core.data config option.
The expected format is an array of nodes, where each node should be an object as described above or a simple string (in which case the string is used for the node's text property ane everything else is autogenerated). Any nested nodes are supplied in the same manner in the childrenproperty of their parent.
$('#using_json').jstree({ 'core' : {
    'data' : [
       'Simple root node',
       {
         'text' : 'Root node 2',
         'state' : {
           'opened' : true,
           'selected' : true
         },
         'children' : [
           { 'text' : 'Child 1' },
           'Child 2'
         ]
      }
    ]
} });
Using the alternative JSON format
$('#using_json_2').jstree({ 'core' : {
    'data' : [
       { "id" : "ajson1", "parent" : "#", "text" : "Simple root node" },
       { "id" : "ajson2", "parent" : "#", "text" : "Root node 2" },
       { "id" : "ajson3", "parent" : "ajson2", "text" : "Child 1" },
       { "id" : "ajson4", "parent" : "ajson2", "text" : "Child 2" },
    ]
} });
Using AJAX
You can also use AJAX to populate the tree with JSON your server returns. The format remains the same as the above, the only difference is that the JSON is not inside the config object, but returned from the server.
To take advantage of this option you need to use the $.jstree.defaults.core.data config option.
Just use a standard jQuery-like AJAX config and jstree will automatically make an AJAX request populate the tree with the response.
In addition to the standard jQuery ajax options here you can supply functions for data andurl, the functions will be run in the current instance's scope and a param will be passed indicating which node is being loaded, the return value of those functions will be used as URL and data respectively.
If you do not return correct json headers from the server, at least set the dataType jQuery AJAX option to "json".
6. EVENTS
jsTree triggers various events on the container. You can review the list of all events to know what to listen for.
To get more information about the event inspect its data argument.
In most cases where a node is involved you will get the whole node object passed in. If you get an ID string somewhere and want to inspect the node just use .get_node().
$('#jstree')
  // listen for event
  .on('changed.jstree', function (e, data) {
    var i, j, r = [];
    for(i = 0, j = data.selected.length; i < j; i++) {
      r.push(data.instance.get_node(data.selected[i]).text);
    }
    $('#event_result').html('Selected: ' + r.join(', '));
  })
  // create the instance
  .jstree();
 JS Tutorial


