User Rating: 0/5 ( 0 votes)
Today we will be developing a small web application called Upload Center, that will allow people to upload photos from their computers by dragging and dropping them onto the browser window, possible with the new HTML5 APIs exposed by modern browsers.
The photos will have a preview and a progress bar, all of which controlled on the client side. Currently, the photos are only stored in a folder on the server, but you could improve it any way you like.
What are HTML5 File Uploads?
Uploading files using HTML5 is actually a combination of three technologies – the new File Reader API, the also new Drag & Drop API, and the good ol’ AJAX (with the addition of binary data transfer). Here is a description of a HTML5 file upload process:
-
The user drops one or more files from their file system to the browser window by dragging. Browsers that support the Drag & Drop API will fire an event, which alongside other useful information, contains a list of files that were dropped;
-
Using the File Reader API, we read the files in the list as binary data, and store them in memory;
-
We use the new sendAsBinary method of the XMLHttpRequest object, and send the file data to the server.
Sounds complicated? Yes, it could use some optimization. Fortunately, there are jQuery plugins that can do this for us. One of them is Filedrop, which is a wrapper around this functionality, and provides features for limiting maximum file size and specifying callback functions, which is really handy for integrating it into your web applications.
Currently file uploads work only in Firefox and Chrome, but upcoming major versions of the other browsers also include support for it. A simple fallback solution for older browsers would be to display a regular file input dialog, but we won’t be doing this today, as we will be focusing our attention on using HTML5.
The HTML
The markup of our Upload Center couldn’t be simpler. We have a regular HTML5 document, which includes our stylesheet and script.js file, the Filedrop plugin and the jQuery library.
index.html
<!DOCTYPE html>
<html>
<head>
<meta charset="utf-8" />
<title>HTML5 File Drag and Drop Upload with jQuery and PHP | Tutorialzine Demo</title>
<link rel="stylesheet" href="assets/css/styles.css" />
</head>
<body>
<header>
<h1>HTML5 File Upload with jQuery and PHP</h1>
</header>
<div id="dropbox">
<span class="message">Drop images here to upload. <br /><i>(they will only be visible to you)</i></span>
</div>
<script src="http://code.jquery.com/jquery-1.6.3.min.js"></script>
<script src="assets/js/jquery.filedrop.js"></script>
<script src="assets/js/script.js"></script>
</body>
</html>
The only div that the Filedrop interacts with, is #dropbox. We will pass this element to the plugin, which will detect when a file is dropped on top of it. The message span is updated if there is an error condition (for example if your browser does not support one of the HTML5 APIs that this example relies on).

HTML5 File Upload Center with PHP and jQuery
Later, when we drop a file, our jQuery code will display a preview by adding the following markup to the page:
<div class="preview done">

    <span class="imageHolder">
        <img src="" />
        <span class="uploaded"></span>
    </span>

    <div class="progressHolder">
        <div class="progress"></div>
    </div>

</div>
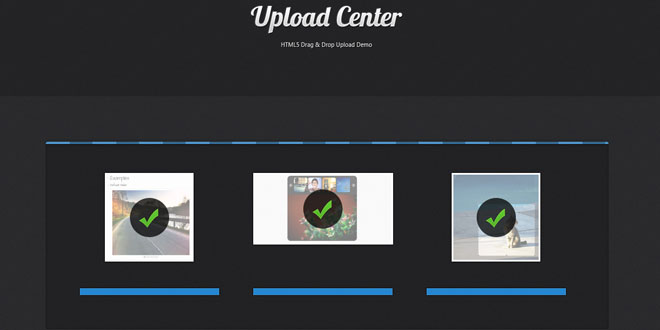
This snippet contains a preview of the image (the source attribute is going to be populated with a DataURL of the picture) and a progress bar. The whole preview can have the “.done” class, which causes the “.uploaded” span to show up (it is hidden by default). This span has the green check mark as its background, and indicates the upload is complete.
Great, lets move on to our script.js file!
The jQuery Code
As all of the actual file transfer functionality is handled by the Filedrop plugin, we only need to call it and pass a few callbacks, so we can hook it to our Upload Center. We will be writing a small PHP script that handles the uploads on the server in the next section.
The first step is to write a helper function that takes a file object (a special object which is created by the web browser on file drop, and has properties like file name, path and size), and creates the markup for previewing the upload.
assets/js/script.js
var template = '<div class="preview">'+
'<span class="imageHolder">'+
'<img />'+
'<span class="uploaded"></span>'+
'</span>'+
'<div class="progressHolder">'+
'<div class="progress"></div>'+
'</div>'+
'</div>';
function createImage(file){
var preview = $(template),
image = $('img', preview);
var reader = new FileReader();
image.width = 100;
image.height = 100;
reader.onload = function(e){
image.attr('src',e.target.result);
};
reader.readAsDataURL(file);
message.hide();
preview.appendTo(dropbox);
$.data(file,preview);
}
The template variable holds the HTML5 markup of the preview. We get the DataURL of the image (a base64 encoded representation of the image bytes) and add it as the source of the image. Everything is then appended to the dropbox container. Now we are left with calling the filedrop plugin:
assets/js/script.js
$(function(){
var dropbox = $('#dropbox'),
message = $('.message', dropbox);
dropbox.filedrop({
paramname:'pic',
maxfiles: 5,
maxfilesize: 2,
url: 'post_file.php',
uploadFinished:function(i,file,response){
$.data(file).addClass('done');
},
error: function(err, file) {
switch(err) {
case 'BrowserNotSupported':
showMessage('Your browser does not support HTML5 file uploads!');
break;
case 'TooManyFiles':
alert('Too many files! Please select 5 at most!');
break;
case 'FileTooLarge':
alert(file.name+' is too large! Please upload files up to 2mb.');
break;
default:
break;
}
},
beforeEach: function(file){
if(!file.type.match(/^image\//)){
alert('Only images are allowed!');
return false;
}
},
uploadStarted:function(i, file, len){
createImage(file);
},
progressUpdated: function(i, file, progress) {
$.data(file).find('.progress').width(progress);
}
});
var template = '...';
function createImage(file){
}
function showMessage(msg){
message.html(msg);
}
});
With this, every valid image file that is dropped on the #dropbox div gets uploaded to post_file.php, which you can see in the next section.

Upload Complete!
The PHP Code
On the PHP side of things, there is no difference between a regular form file upload and a drag and drop one. This means that you can easily provide a fallback solution to your application and reuse the same backend.
post_file.php
$demo_mode = false;
$upload_dir = 'uploads/';
$allowed_ext = array('jpg','jpeg','png','gif');
if(strtolower($_SERVER['REQUEST_METHOD']) != 'post'){
exit_status('Error! Wrong HTTP method!');
}
if(array_key_exists('pic',$_FILES) && $_FILES['pic']['error'] == 0 ){
$pic = $_FILES['pic'];
if(!in_array(get_extension($pic['name']),$allowed_ext)){
exit_status('Only '.implode(',',$allowed_ext).' files are allowed!');
}
if($demo_mode){
$line = implode(' ', array( date('r'), $_SERVER['REMOTE_ADDR'], $pic['size'], $pic['name']));
file_put_contents('log.txt', $line.PHP_EOL, FILE_APPEND);
exit_status('Uploads are ignored in demo mode.');
}
if(move_uploaded_file($pic['tmp_name'], $upload_dir.$pic['name'])){
exit_status('File was uploaded successfuly!');
}
}
exit_status('Something went wrong with your upload!');
function exit_status($str){
echo json_encode(array('status'=>$str));
exit;
}
function get_extension($file_name){
$ext = explode('.', $file_name);
$ext = array_pop($ext);
return strtolower($ext);
}
The script runs some checks on the HTTP method that was used to request the page and the validity of the file extension. Demo mode is mainly for demo.tutorialzine.com, where I don’t want to store any file uploads (if you don’t call move_uploaded_file in your script, the file is deleted automatically at the end of the request).
Now lets make it pretty!
The CSS Styles
I left out the parts of the stylesheet that are not directly related to the uploads. You can see everything in styles.css.
assets/css/styles.css
#dropbox{
background:url('../img/background_tile_3.jpg');
border-radius:3px;
position: relative;
margin:80px auto 90px;
min-height: 290px;
overflow: hidden;
padding-bottom: 40px;
width: 990px;
box-shadow:0 0 4px rgba(0,0,0,0.3) inset,0 -3px 2px rgba(0,0,0,0.1);
}
#dropbox .message{
font-size: 11px;
text-align: center;
padding-top:160px;
display: block;
}
#dropbox .message i{
color:#ccc;
font-size:10px;
}
#dropbox:before{
border-radius:3px 3px 0 0;
}
#dropbox .preview{
width:245px;
height: 215px;
float:left;
margin: 55px 0 0 60px;
position: relative;
text-align: center;
}
#dropbox .preview img{
max-width: 240px;
max-height:180px;
border:3px solid #fff;
display: block;
box-shadow:0 0 2px #000;
}
#dropbox .imageHolder{
display: inline-block;
position:relative;
}
#dropbox .uploaded{
position: absolute;
top:0;
left:0;
height:100%;
width:100%;
background: url('../img/done.png') no-repeat center center rgba(255,255,255,0.5);
display: none;
}
#dropbox .preview.done .uploaded{
display: block;
}
#dropbox .progressHolder{
position: absolute;
background-color:#252f38;
height:12px;
width:100%;
left:0;
bottom: 0;
box-shadow:0 0 2px #000;
}
#dropbox .progress{
background-color:#2586d0;
position: absolute;
height:100%;
left:0;
width:0;
box-shadow: 0 0 1px rgba(255, 255, 255, 0.4) inset;
-moz-transition:0.25s;
-webkit-transition:0.25s;
-o-transition:0.25s;
transition:0.25s;
}
#dropbox .preview.done .progress{
width:100% !important;
}
The .progress div is positioned absolutely. Changing its width (in percent) makes for a natural progress indicator. Throw in a 0.25 transition, and you have animated increments which would be a bit tricky to do with jQuery alone.
With this our HTML5 Upload Center is complete!
 JS Tutorial


