- Overview
- Documents
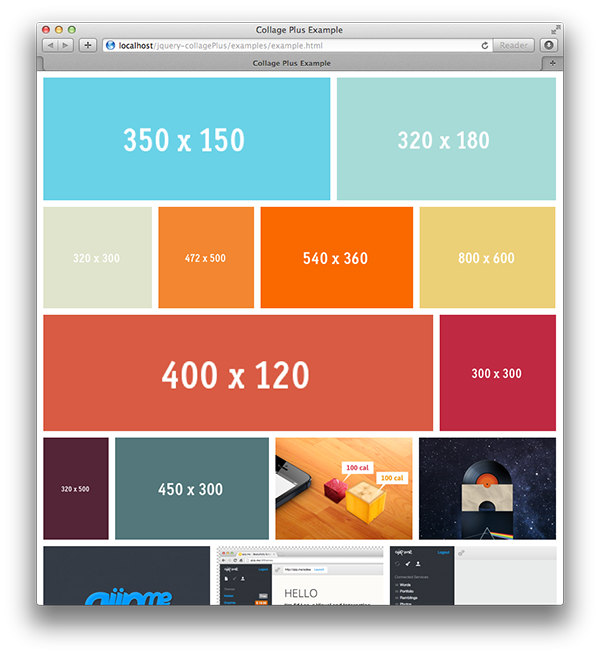
This plugin for jQuery will arrange your images to fit exactly within a container. You can define the padding between images, give the images css borders and define a target row height.
Basic Usage
    // example HTML image gallery
    <div class="Collage">
        <img src="example1.jpg" />
        <img src="example2.jpg" />
        <img src="example3.jpg" />
    </div>

    // collagePlus-ify it!
    $('.Collage').collagePlus();
Do You Know Your Image Sizes?
This plugin can work in two different ways:
- You don't know all the image sizes for the images you you want to display
- You know the images sizes for the images you want to display
For case 1, you will need to load all images for the plugin to then measure them and calculate the resizing required to make the grid. A very basic example would be something like:
    $(window).load(function () {
        $('.Collage').collagePlus();
    });
This ensures that all images are loaded before running the plugin. The downside of this method is that it takes a while for anything to appear on the screen. The benefit is that if you are loading images from another source that does not specify image sizes, the plugin will still work.
However, if you know the image sizes (case 2), i.e.
<img src="example.jpg" width="400" height="300" />
Then you do not need to wait for the images to load before running the plugin (so you can forget about $(window).load(.... This calculates the grid and then reveals the images as they are loaded. See this example.
Of course, if you know the image sizes then it's probably better to calculate the grid server-side... but you can be lazy and use this plugin instead :)
Getting Started
/* In your CSS */
.Collage{

    /* define how much padding you want in between your images */
    padding:10px;

    }

.Collage img{

    /* ensures padding at the bottom of the image is correct */
    vertical-align:bottom;

    /* hide the images until the plugin has run. the plugin will reveal the images*/
    opacity:0;

    }
Ensure you have no whitespace between your image tags for a clean grid.
<!-- In your HTML -->
<div class="Collage">
<img src="http://placehold.it/350x150"><img src="http://placehold.it/400x300"><img src="http://placehold.it/290x800">
</div>
Alternatively, use the jquery.removeWhitespace.js plugin in the extras directory to do this for you e.g.
$('.Collage').removeWhitespace().collagePlus();
You may want to run the plugin with an image loader likehttps://github.com/desandro/imagesloaded, alternatively you can try it with
$(window).load(function () {
    $('.Collage').collagePlus();
});
Transitions
Version 0.3.0 introduced transitions which reveal the image grid using different CSS animations. These do not support less than IE10 but you can fall back to the default transition in that case (this is something you need to actively do, it's not a plugin behaviour).
There are currently 6 different transitions (effect-1 to effect-6) which you can see in the examples. You can also code your own CSS transition, this codedrops article is a good place to look - it inspired the ones in this plugin.
All you need to do is include the "transitions.css" css file and pick which effect you want to use:
    $('.Collage').collagePlus(
        {
            'effect' : 'effect-1',
        }
    );
There is also an options for "direction". This applies the effect on a per-row or per-image-in-row basis. So for "vertical" the images will appear from the top of the browser window downwards. For "horizontal" the images will appear from the left and move across the browser. It's a subtle animation difference.
The Last Row - Image Scaling
Sometimes the images on the last row will scale a lot if, for example, there is just one image and it needs to fill the parent element width.
You can control this behaviour with:
    $('.Collage').collagePlus(
        'allowPartialLastRow' : true
    );
And here is an example of the difference that setting makes:

All the [useful] options
    $('.Collage').collagePlus(
        {
            /*
             * The ideal height you want your row to be. It won't set it exactly to this as
             * plugin adjusts the row height to get the correct width
             */
            'targetHeight'    : 400,

            /*
             * how quickly you want images to fade in once ready can be in ms, "slow" or "fast"
             * This is only used in the default fade in effect. Timing of the other effects is
             * controlled in CSS
             */
            'fadeSpeed'       : "fast",

            /*
             * which effect you want to use for revealing the images (note CSS3 browsers only),
             * Options are effect-1 to effect-6 but you can also code your own
             * Default is the safest option for supporting older browsers
             */
            'effect'          : 'default',

            /*
             * vertical: effects applied per row to give the impression of descending appearance
             * horizontal: effects applied in order of appearance in the row to give a horizontal appearance
             */
            'direction'       : 'vertical'

            /*
            * Sometimes there is just one image on the last row and it gets blown up to a huge size to fit the
            * parent div width. To stop this behaviour, set this to true
            */
            'allowPartialLastRow'       : false
        }
    );
Browser Resize
By default this behaviour is not included in the plugin but you can use a few lines of js to reload the images if the user resizes the browser window
function collage() {
    $('.Collage').collagePlus(
        {
            'fadeSpeed' : 2000
        }
    );
};

var resizeTimer = null;
$(window).bind('resize', function() {
    // hide all the images until we resize them
    // set the element you are scaling i.e. the first child nodes of ```.Collage``` to opacity 0
    $('.Collage .Image_Wrapper').css("opacity", 0);
    // set a timer to re-apply the plugin
    if (resizeTimer) clearTimeout(resizeTimer);
    resizeTimer = setTimeout(collage, 200);
});
Notes
CollagePlus relies on all images being loaded before it can calculate the layout. It does not run off image sizes specified in the DOM. If you have image sizes available in the DOM then you're probably better off calculating the layout server-side (assuming that's where you got the image sizes from) and writing the result directly to the HTML template you're generating.
 JS Tutorial


