- Overview
- Documents
What is CamanJS?
CamanJS is (ca)nvas (man)ipulation in Javascript. It's a combination of a simple-to-use interface with advanced and efficient image/canvas editing techniques.
CamanJS is very easy to extend with new filters and plugins, and it comes with a wide array of image editing functionality, which continues to grow. It's completely library independent and works both in NodeJS and the browser.
Basic Example
Caman('#my-image', function () {
    this.brightness(10);
    this.contrast(30);
    this.sepia(60);
    this.saturation(-30);
    this.render();
  });
HTML data attribute
  <img
    data-caman="brightness(10) contrast(30) sepia(60) saturation(-30)"
    data-caman-hidpi="/path/to/[email protected]"
    src="path/to/image.jpg"
  >
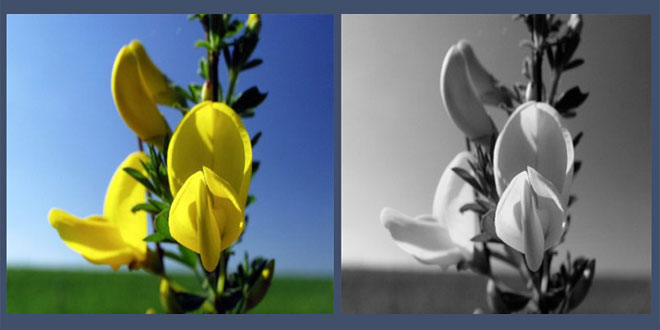
Before
After
Basic Usage
Browser - Basic Usage
One very important thing to note: due to browser security restrictions, CamanJS can only modify images that come from the same domain as the page in which it's loaded unless the image has a properly configured CORS policy or you specify a proxy (more info below).
First, we'll need to include the appropriate Javascript files:
<!-- Either include the full CamanJS code including plugins -->
<script type="text/javascript" src="caman.full.min.js"></script>

<!-- Or include the core library and some plugins/filters -->
<script type="text/javascript" src="caman.min.js"></script>
<script type="text/javascript" src="plugins/myplugin.js"></script>
Loading an Image into a Canvas via URL
This method assumes you already have a canvas element in the page, and you would like to load an image via URL into the canvas for editing with CamanJS. You can also give DOM objects instead of Strings if you prefer.
Caman("#canvas-id", "path/to/image.jpg", function () {
  // manipulate image here
  this.brightness(5).render();
});
Replace an Image with a Canvas
This performs an "in-place" initialization by replacing the given image with an identically sized canvas. If you don't modify the image at all, it will look identical to the user. This can also accept a DOM object instead of a CSS selector.
Caman("#image-id", function () {
  this.brightness(5).render();
});
Loading a Canvas with Existing Image Data
If you have a canvas you want to modify, but it already has image data on it, you can give the canvas as the first argument. This can accept a DOM object as well.
Caman("#canvas-id", function () {
  this.brightness(5).render();
});
HiDPI Support
CamanJS supports HiDPI displays (also known as Retina displays) as of version 4. Specifying HiDPI image replacements is done via the data-caman-hidpi HTML attribute.
<img
  src="/path/to/image.jpg"
  data-caman-hidpi="/path/to/[email protected]"
>
If a HiDPI display is detected, CamanJS will automatically switch to the HiDPI version if available unless you force disable it with the data-caman-hidpi-disabled attribute. It's important to remember that higher resolution images take longer to render, simply because they have more pixels.
NodeJS
Installation
We can easily install CamanJS using npm. In the base folder of your project, run:
npm install caman
If you run into issues installing CamanJS, you may need to install/update some dependencies. You need:
- cairo
- libjpeg
- libpng
Basic Usage
Initialization with NodeJS is extremely simple. You can either give Caman the path to an image on disk, or an already initialized File object.
Once you are done modifying the image, you can save the modified image to disk as well.
var Caman = require('caman').Caman;

Caman("/path/to/file.png", function () {
  this.brightness(5);
  this.render(function () {
    this.save("/path/to/output.png");
  });
});
Advanced Usage
Once you've gotten the CamanJS basics down, there are some more advanced techniques for you to explore.
Layers
CamanJS has a powerful layering system built-in that gives you even more editing power. Layers in CamanJS use a slightly different paradigm than those in editing applications like Photoshop. Layers can be nested, but they always apply effects to their parents like a stack.
When layers are applied to their parents, it is done using a particular blending mode. The default is "normal".
Caman("#image", function () {
  // We can call any filter before the layer
  this.exposure(-10);

  // Create the layer
  this.newLayer(function () {
    // Change the blending mode
    this.setBlendingMode("multiply");

    // Change the opacity of this layer
    this.opacity(80);

    // Now we can *either* fill this layer with a
    // solid color...
    this.fillColor('#6899ba');

    // ... or we can copy the contents of the parent
    // layer to this one.
    this.copyParent();

    // Now, we can call any filter function though the
    // filter object.
    this.filter.brightness(10);
    this.filter.contrast(20);
  });

  // And we can call more filters after the layer
  this.clip(10);
  this.render();
});
Blenders
As mentioned above in the Layers section, when a layer is applied to it's parent, it uses a blending function. The built-in blending functions are:
- normal
- multiply
- screen
- overlay
- difference
- addition
- exclusion
- softLight
- lighten
- darken
It is extremely easy to extend CamanJS with new blending functions as well. More info is available in the Extending CamanJS section.
Cropping/Resizing
CamanJS allows you to crop and resize canvases with ease. This can be done either at initialization time, or later on.
Note that, at this time, resizing at initialization is the only part included in the core library. You will either have to use the full version of CamanJS or include the size plugin manually if you want to crop or resize later.
Resize at Initialization
Resizing at initialization is handled by the data attributes camanwidth and camanheight. Specifying one or both will resize the image when it is applied to the canvas. The image will be stretched if the given size has a different width:height ratio than the original.
<img
  src="path/to/image.jpg"
  data-camanwidth="500"
  data-camanheight="500"
>
Resize via Plugin
Resizing is provided as a CamanJS plugin. You must specify at least width or height. Changing the width:height ratio will stretch the image.
Caman("#image", function () {
  this.resize({
    width: 500,
    height: 300
  });

  // You still have to call render!
  this.render();
});
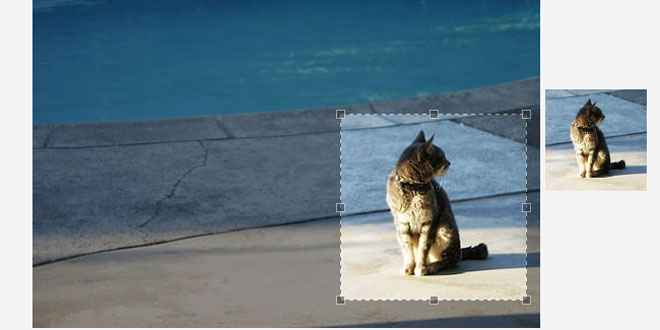
Crop via Plugin
Cropping is also provided as a CamanJS plugin. You must specify at least the new width and height. You can optionally also specity the coordinates of the top left corner where the cropping should start.
Caman("#image", function () {
  // width, height, x, y
  this.crop(500, 300);

  // Still have to call render!
  this.render();
});
Events
CamanJS has an event system that lets you execute callbacks when specific actions occur. You can listen to events from all CamanJS instances on a page, or specific individual instances. The available events are:
- processStart
- processComplete
- renderFinished
- blockStarted
- blockFinished
processStart and processComplete are triggered when a single filter starts and finishes rendering. When all filters are finished and the modification is complete,renderFinished is triggered. The renderer in CamanJS splits the image into blocks, so when a single block starts and finishes rendering, blockStarted and blockFinishedare triggered. These are also useful for tracking render progress for larger images.
// Listen to all CamanJS instances
Caman.Event.listen("processStart", function (job) {
  console.log("Start:", job.name);
});

// Listen to a single instance only
c = Caman("#image");
Caman.Event.listen(c, "processComplete", function (job) {
  console.log("Finished:", job.name);
});
More information at: http://camanjs.com/guides/#BasicUsage
 JS Tutorial
