- Overview
- Documents
Touch Image Gallery
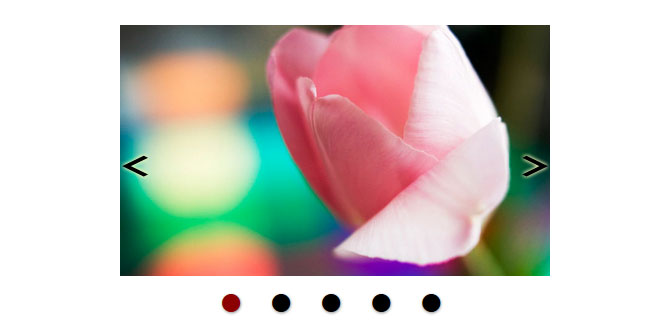
Description: Touch Image Gallery is a simple image gallery that caters to mobile and desktop browsers alike, by being touch/ swipe friendly, in addition to the traditional way of navigating. The gallery can be navigated in the following intuitive ways:
- By swiping left or right using your fingers in mobile browsers, or dragging using a mouse.
- By tapping or clicking on either the left or right edges of the gallery.
- By clicking on the auto generated bullets underneath the gallery.
The gallery itself consists of just a regular UL list with images defined inside it. A simple to implement, cross device friendly gallery this is!
Step 1: Add the following script to the <head> section of your page:
<link rel="stylesheet" href="touchgallery.css" />

<script type="text/javascript" src="http://ajax.googleapis.com/ajax/libs/jquery/1.8/jquery.min.js"></script>
<script type="text/javascript" src="jquery.touchSwipe.min.js"></script>

<script src="touchgallery.js">

/***********************************************
* Touch Image Gallery- (c) Dynamic Drive DHTML code library (www.dynamicdrive.com)
* This notice MUST stay intact for legal use
* Visit Dynamic Drive at http://www.dynamicdrive.com/ for this script and 100s more
***********************************************/

</script>

<script>

jQuery(function(){ // on DOM load
		$('div#touchgallery1').touchgallery({  // initialize first demo
			width: 250,
			height: 200
		})
		$('div#touchgallery2').touchgallery({  // initialize second demo
			width: 400,
			height: 350
		})
	})

</script>
The code above references the following external files, which you should download and upload to the same directory as your webpage:
Important Note: Your page should contain a valid doctype at the very top in order for this script to work as intended, such as:

<!doctype html>
Step 2: Add the below HTML markup for the two demo galleries to your page:
<div id="touchgallery1" class="touchgallery">
<ul>
<li><img src="pool.jpg" /></li>
<li><img src="cave.jpg" /></li>
<li><img src="fruits.jpg" /></li>
<li><img src="autumn.jpg" /></li>
</ul>
</div>

<br /><br />

<div id="touchgallery2" class="touchgallery">
<ul>
<li><img src="amster1.jpg" /></li>
<li><img src="amster2.jpg" /></li>
<li><img src="amster3.jpg" /></li>
<li><img src="amster4.jpg" /></li>
</ul>
</div>
Each gallery should consist of an outer DIV with an unique ID and a CSS class of "touchgallery". Inside this DIV, a regular UL list with images as its content completes the markup.
More information
To initialize a new Touch Image Gallery, first, reference the above DIV container via its ID attribute, then call the method touchgallery() on top of it. This takes place in the HEAD section of your page:
<script>
jQuery(function(){ // on DOM load
 $('div#touchgallery1').touchgallery({ // initialize first demo
  width: 250,
  height: 200
 })
})
</script>
Notice the width and height settings defined inside touchgallery()- they should correspond to the desired dimensions of the gallery. All images inside it will be shown in their native dimensions unless their width exceeds that of the gallery's. In that case, the image will be scaled appropriately to fit. The following table lists all of the options you can pass intotouchgallery().
| Option | Description |
| width: int | The width of the gallery (pixel unit assumed). All images inside it will display in their native width unless the image's width exceeds that of the gallery's. In that case it will scale down to the gallery's width instead. |
| height: int |
The height of the gallery (pixel unit assumed). All images inside it will display in their native height unless the image's width exceeds that of the gallery's. In that case it will scale down based on the image's new, scaled width.
When setting the height option, take into account the additional space needed to show the auto generated bullet links at the end of the gallery. |
| navarea: 'percent' | Sets the area of the left and right edges of the gallery that's clickable to navigate the gallery back and forth, respectively. For example, a "20%" setting means 20% of the left and right edges of the gallery will be clickable. |
| threshold: int |
Sets the threshold (pixels assumed) the user has to swipe before the gallery advances to the next image. If the threshold is not met, the gallery bounces back to the current image. For example:
<script>
jQuery(function(){ // on DOM load
 $('div#touchgallery1').touchgallery({ // initialize first demo
  width: 250,
  height: 200,
  threshold: 100 // <-- no comma after last option!
 })
})
</script>
|
| navbuttons: ['left.png', 'right.png', int] |
Sets the paths to the left and right navigation buttons that appear when the user moves his mouse over the gallery, or in mobile platforms, when he taps on it. The final parameter sets the vertical offset (pixels assumed) of each image from its default center position. For example, the following setting moves the navigational images up 20 pixels from the center of the gallery:
<script>
jQuery(function(){ // on DOM load
 $('div#touchgallery1').touchgallery({ // initialize first demo
  width: 250,
  height: 200,
  navbuttons: ['left.png', 'right.png', -20]
 })
})
</script>
|
You may also want to edit touchgallery.css to make additional changes to the look of each gallery. For example, to modify the animation speed of the swipe, edit the corresponding code in red below:
.touchgallery ul{
list-style: none;
margin: 0;
padding: 0;
left: 0;
position: absolute;
-moz-transition: all 100ms ease-in-out; /* image transition. Change 100ms to desired transition duration */
-webkit-transition: all 100ms ease-in-out;
transition: all 100ms ease-in-out;
}
 JS Tutorial


