User Rating: 4.4/5 ( 3 votes)
File Upload widget with multiple file selection, drag & drop support, progress bar, validation and preview images, audio and video for jQuery. Supports cross-domain, chunked and resumable file uploads. Works with any server-side platform (Google App Engine, PHP, Python, Ruby on Rails, Java, etc.) that supports standard HTML form file uploads.
Features
-
Multiple file upload:
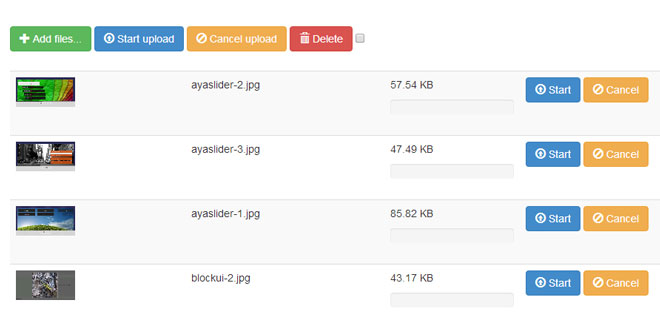
Allows to select multiple files at once and upload them simultaneously.
-
Drag & Drop support:
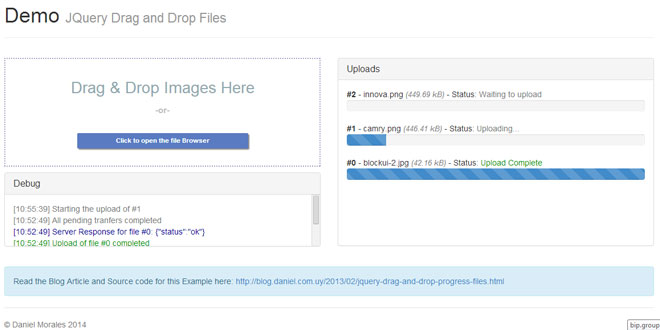
Allows to upload files by dragging them from your desktop or filemanager and dropping them on your browser window.
-
Upload progress bar:
Shows a progress bar indicating the upload progress for individual files and for all uploads combined.
-
Cancelable uploads:
Individual file uploads can be canceled to stop the upload progress.
-
Resumable uploads:
Aborted uploads can be resumed with browsers supporting the Blob API.
-
Chunked uploads:
Large files can be uploaded in smaller chunks with browsers supporting the Blob API.
-
Client-side image resizing:
Images can be automatically resized on client-side with browsers supporting the required JS APIs.
-
Preview images, audio and video:
A preview of image, audio and video files can be displayed before uploading with browsers supporting the required APIs.
-
No browser plugins (e.g. Adobe Flash) required:
The implementation is based on open standards like HTML5 and JavaScript and requires no additional browser plugins.
-
Graceful fallback for legacy browsers:
Uploads files via XMLHttpRequests if supported and uses iframes as fallback for legacy browsers.
-
HTML file upload form fallback:
Allows progressive enhancement by using a standard HTML file upload form as widget element.
-
Cross-site file uploads:
Supports uploading files to a different domain with cross-site XMLHttpRequests or iframe redirects.
-
Multiple plugin instances:
Allows to use multiple plugin instances on the same webpage.
-
Customizable and extensible:
Provides an API to set individual options and define callBack methods for various upload events.
-
Multipart and file contents stream uploads:
Files can be uploaded as standard "multipart/form-data" or file contents stream (HTTP PUT file upload).
-
Compatible with any server-side application platform:
Works with any server-side platform (PHP, Python, Ruby on Rails, Java, Node.js, Go etc.) that supports standard HTML form file uploads.
Requirements
Mandatory requirements
The jQuery UI widget factory is a requirement for the basic File Upload plugin, but very lightweight without any other dependencies from the jQuery UI suite.
Browsers
Desktop browsers
The File Upload plugin is regularly tested with the latest browser versions and supports the following minimal versions:
-
Google Chrome
-
Apple Safari 4.0+
-
Mozilla Firefox 3.0+
-
Opera 11.0+
-
Microsoft Internet Explorer 6.0+
Mobile browsers
The File Upload plugin has been tested with and supports the following mobile browsers:
-
Apple Safari on iOS 6.0+
-
Google Chrome on iOS 6.0+
-
Google Chrome on Android 4.0+
-
Default Browser on Android 2.3+
-
Opera Mobile 12.0+
Basic plugin
How to use only the Basic plugin (minimal setup guide)
The plugin download package comes with a complete user interface based on Bootstrap.
However, if you want to build your own user interface, it is possible to use only the basic plugin version and a minimal setup.
The following is an alternative to index.html with only the minimal requirements and a simple done callback handler (see API and Options on how to use the different options and callbacks):
<!DOCTYPE HTML>
<html>
<head>
<meta charset="utf-8">
<title>jQuery File Upload Example</title>
</head>
<body>
<input id="fileupload" type="file" name="files[]" data-url="server/php/" multiple>
<script src="//ajax.googleapis.com/ajax/libs/jquery/1.9.1/jquery.min.js"></script>
<script src="js/vendor/jquery.ui.widget.js"></script>
<script src="js/jquery.iframe-transport.js"></script>
<script src="js/jquery.fileupload.js"></script>
<script>
$(function () {
    $('#fileupload').fileupload({
        dataType: 'json',
        done: function (e, data) {
            $.each(data.result.files, function (index, file) {
                $('<p/>').text(file.name).appendTo(document.body);
            });
        }
    });
});
</script>
</body>
</html>
Response and data type
The example above sets the dataType option to json, expecting the server to return a JSON response for each uploaded file. However it's also possible to handle HTML content types as response or any other dataType that you can handle in your done handler.
How to display upload progress with the basic plugin
The fileupload plugin triggers progress events for both individual uploads (progress) and all running uploads combined (progressall). Event handlers can be set via the event binding mechanism or as widget options (see API and Options documentation):
$('#fileupload').fileupload({
    /* ... */
    progressall: function (e, data) {
        var progress = parseInt(data.loaded / data.total * 100, 10);
        $('#progress .bar').css(
            'width',
            progress + '%'
        );
    }
});
The previous code assumes a progress node with an inner element that displays the progress status via its width percentage:
<div id="progress">
    <div class="bar" style="width: 0%;"></div>
</div>
The inner element should have a different background color than the container node, set via CSS and needs a height applied:
.bar {
    height: 18px;
    background: green;
}
How to tie a file to an element node during the life cycle of an upload
Often, you will display a file to upload in an element node. This can be done in the add callback.
To be able to refer to the same element node in other callbacks related to the upload, you can make use of the context option (which is actually an option of jquery.ajax):
$(function () {
    $('#fileupload').fileupload({
        dataType: 'json',
        add: function (e, data) {
            data.context = $('<p/>').text('Uploading...').appendTo(document.body);
            data.submit();
        },
        done: function (e, data) {
            data.context.text('Upload finished.');
        }
    });
});
How to start uploads with a button click
Based on the previous example, it's possible to start uploads on the click of a button instead of automatically:
$(function () {
    $('#fileupload').fileupload({
        dataType: 'json',
        add: function (e, data) {
            data.context = $('<button/>').text('Upload')
                .appendTo(document.body)
                .click(function () {
                    data.context = $('<p/>').text('Uploading...').replaceAll($(this));
                    data.submit();
                });
        },
        done: function (e, data) {
            data.context.text('Upload finished.');
        }
    });
});
Setup instructions
Note: Although the demo implementations contained in this repository include source files from remote servers, it is recommended to download all dependencies and upload them to your own server.
This excludes script files hosted on Google's Content Delivery Network, which is a more reliable source than GitHub demo pages.
Using jQuery File Upload (UI version) on PHP websites
The provided example implementation works out of the box and only needs one step for you to add it to your PHP based website:
-
Download the plugin archive, extract it and upload the extracted folder (you may rename it) to your server.
Visit the uploaded directory - you should see the same file upload interface as the demo, allowing you to upload files to your website.
If uploading files doesn't work, make sure that the php/files directory permissions allow your server write access.
Note:
Please keep in mind some Security considerations when running a file upload handler on your server.
Using jQuery File Upload (UI version) with Google App Engine
-
Download the plugin archive, extract it and upload the server/gae-python or server/gae-go folder (depending on which runtime environment you want to use) as your App Engine instance, after editing the app.yaml inside if the folder and replacing "jquery-file-upload" with your own App ID.
-
Upload the jQuery-File-Upload folder (without the server subfolder) to any server, after adjusting the url option in main.js to the url of your App Engine instance.
Visit the uploaded directory - you should see the same file upload interface as the demo, allowing you to upload files to your App Engine instance.
Using jQuery File Upload (UI version) with Node.js
You can install the sample Node.js upload service on your server via npm:
npm install blueimp-file-upload-node
You can start the service by running the following command:
./node_modules/blueimp-file-upload-node/server.js
Next, download the plugin archive, extract it, and adjust the url option in main.js to the url of your Node.js service (e.g. "http://localhost:8080").
You can then upload the project folder (without the unnecessary server subfolder) to any static file server and use it as interface to yourNode.js upload service.
Make sure to have imagemagick CLI tools installed on the server running the node upload service.
Using jQuery File Upload (UI version) with a custom server-side upload handler
-
Implement a file upload handler on your platform (Ruby, Python, Java, etc.) that handles normal form based file uploads and upload it to your server. See also the Server-side specific tutorials on the Documentation Homepage.
-
Download and extract the plugin archive.
-
Edit main.js and adjust the url option to the URL of your custom file upload handler. Alternatively you can remove the url option and editindex.html and adjust the action attribute of the HTML form element to the URL of your custom file upload handler. If your upload handler requires another parameter name for the file uploads than files[], you also have to adjust the file input name attribute or set theparamName option (see Options documentation).
-
Upload the jQuery-File-Upload folder to your website.
-
Extend your custom server-side upload handler to return a JSON response akin to the following output:
{"files": [
  {
    "name": "picture1.jpg",
    "size": 902604,
    "url": "http:\/\/example.org\/files\/picture1.jpg",
    "thumbnailUrl": "http:\/\/example.org\/files\/thumbnail\/picture1.jpg",
    "deleteUrl": "http:\/\/example.org\/files\/picture1.jpg",
    "deleteType": "DELETE"
  },
  {
    "name": "picture2.jpg",
    "size": 841946,
    "url": "http:\/\/example.org\/files\/picture2.jpg",
    "thumbnailUrl": "http:\/\/example.org\/files\/thumbnail\/picture2.jpg",
    "deleteUrl": "http:\/\/example.org\/files\/picture2.jpg",
    "deleteType": "DELETE"
  }
]}
To return errors to the UI, just add an error property to the individual file objects:
{"files": [
  {
    "name": "picture1.jpg",
    "size": 902604,
    "error": "Filetype not allowed"
  },
  {
    "name": "picture2.jpg",
    "size": 841946,
    "error": "Filetype not allowed"
  }
]}
When removing files using the delete button, the response should be like this:
{"files": [
  {
    "picture1.jpg": true
  },
  {
    "picture2.jpg": true
  }
]}
Note that the response should always be a JSON object containing a files array even if only one file is uploaded.
Visit the uploaded directory - you should see the same file upload interface as in the demo, allowing you to upload files to your website.
Content-Type Negotiation
The file upload plugin makes use of an Iframe Transport module for browsers like Microsoft Internet Explorer and Opera, which do not yet support XMLHTTPRequest file uploads.
Iframe based uploads require a Content-type of text/plain or text/html for the JSON response - they will show an undesired download dialog if the iframe response is set to application/json.
You can make use of the Accept header to offer different content types for the file upload response. Here is the (PHP) example code snippet for the Accept content-type variation:
<?php
header('Vary: Accept');
if (isset($_SERVER['HTTP_ACCEPT']) &&
    (strpos($_SERVER['HTTP_ACCEPT'], 'application/json') !== false)) {
    header('Content-type: application/json');
} else {
    header('Content-type: text/plain');
}
?>
Here is a Ruby on Rails example to serve the proper Content-Type:
def update_attachment
  name  = params[:attachment_name]
  style = params[:attachment_style]
  image = params[:user][name]

  raise "No attachment #{name} for User!" unless User.attachment_definitions[name.to_sym]

  current_user.update("#{name}" => image)
  render(json: current_user.to_fileupload(name, style), content_type: request.format)
end
Thanks to the content_type option of render, the correct header is set for both IE and true browsers.
For the record, here is the to_fileupload method:
def to_fileupload(attachment_name, attachment_style)
  {
    files: [
      {
        id:   read_attribute(:id),
        name: read_attribute("#{attachment_name}_file_name"),
        type: read_attribute("#{attachment_name}_content_type"),
        size: read_attribute("#{attachment_name}_file_size"),
        url:  send(attachment_name).url(attachment_style)
      }
    ]
  }
end
More information at: https://github.com/blueimp/jQuery-File-Upload/wiki
 JS Tutorial


