- Overview
- Documents

Fathom.js
Present JavaScript in its native environment.
If you're making a presentation on JavaScript, make it in Javascript.
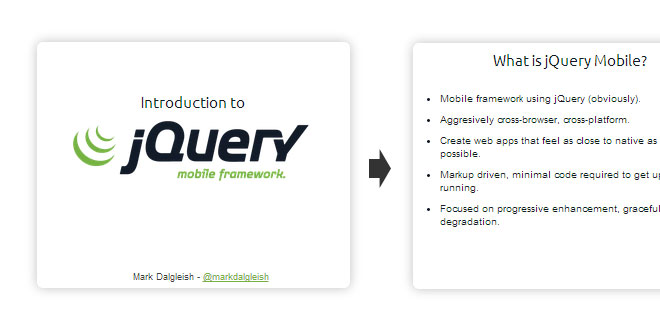
Write your slideshow in HTML, style it with CSS and control it with some jQuery-powered JavaScript. When you're done, Fathom.js even lets you sync the video of your presentation quickly and easily.
Fathom.js comes with mouse, keyboard and scroll bar navigation built in and provides a simple API for creating your own custom interfaces.
Write your slides with simple markup.
<div id="presentation">

  <div class="slide">
    <h1>My Presentation</h1>
  </div>

  <div class="slide">
    <h2>My Dot Points</h2>
    <ul>
      <li>First dot point</li>
      <li>Second dot point</li>
      <li>Third dot point</li>
    </ul>
  </div>

</div>
Bring your slides to life with Fathom.js.
Setup your presentation using the built in jQuery plugin:
$('#presentation').fathom();
Alternatively, use the advanced setup for custom interfaces:
var fathom = new Fathom('#presentation');
Configure Fathom.js to suit your needs.
| displayMode |
Choose between showing one slide at a time or showing all slides in a continuous line. Options: 'single' or 'multi' Default: 'single' |
|---|---|
| margin |
The amount of space in pixels between slides when using a 'displayMode' of 'multi'. Default: 100 |
| portable |
Toggle between full screen and portable mode. Default: Set automatically based on whether the 'body' tag is the presentation's parent. |
| video | An object literal that defines a video to sync the presentation with. |
| timeline | An array of times for controlling the video.For more details, refer to the video sync section below. |
| slideTagName |
The tag used for your slides. Default: 'div' |
| slideClass |
The class used for your slides. Default: 'slide' |
| activeClass |
The class applied to the active slides. Default: 'activeslide' |
| inactiveClass |
The class applied to all inactive slides. Default: 'inactiveslide' |
| portableTagName |
If 'portable' is true, the tag used for your portable container. Default: 'div' |
| portableClass |
If 'portable' is true, the class used for your portable container. Default: 'fathom-container' |
| onScrollInterval |
The amount of time in milliseconds to wait between checking which slide is in the middle of the screen in order to activate slides while scrolling. Default: 300 |
| scrollLength |
The length of the scroll animation in milliseconds. Default: 600 |
| easing |
The easing function for the scrolling animation. Default: 'swing' |
| onActivateSlide | Callback function which is called whenever a slide is activated. Inside the function, thisrefers to a jQuery-wrapped reference to the activated slide. |
| onDeactivateSlide | Callback function which is called whenever a slide is deactivated. Inside the function,this refers to a jQuery-wrapped reference to the deactivated slide. |
You can configure Fathom.js any of the following ways:
// When using the jQuery plugin:
$('#presentation').fathom({
  dislayMode: 'single',
  slideTagName: 'section'
});

// When instantiating the class:
var fathom = new Fathom('#presentation', {
  onActivateSlide: function() {
    console.log(this);
  }
});

// Or, you can modify the global defaults:
Fathom.setDefaults({
  displayMode: 'multi',
  margin: 200
});
Sync your presentation with a video.
Have a video of your presentation? Syncing it with your original Fathom.js presentation couldn't be easier.
$('#presentation').fathom({
  timeline: [ 0, 5, 20, 30, 40, 50, 60, 75, 90, 120, 155 ],
  video: {
    source: 'vimeo',
    id: '16917950',
    parent: '#vimeo',
    autoplay: true
  }
});
The 'video' setting takes the following options:
| source |
The name of the video provider. n.b. Currently Fathom.js only supports Vimeo. |
|---|---|
| id | The ID of the video from the video's provider. |
| parent | The element to append the video element to. |
| autoplay | Boolean indicating whether to play the video automatically. |
The 'timeline' setting supports several different formats, all of which can be used interchangeably within the same timeline:
timeline: [ 0, 20, 30, 50, '1:00', '1:15' ]
If you need more fine-grained control, Fathom.js even lets you specify which slide to activate using either the slide's index or a jQuery selector:
timeline: [
  {
    time: '0:00',
    slide: 0
  },
  {
    time: '0:20',
    slide: '#slide1'
  },
  {
    time: '0:30',
    slide: 0
  }
]
Create your own custom interface.
Apart from styling your presentation however you like with CSS, you also have direct control over the state of the presentation.
First, create an instance of the Fathom class like so:
var fathom = new Fathom('#presentation');
Now you can, for example, hook up some left and right navigation arrows:
$('#leftarrow').click(function(){
  fathom.prevSlide();
});

$('#rightarrow').click(function(){
  fathom.nextSlide();
});
Any instance of the Fathom class exposes the following methods:
| nextSlide() | Activates the next slide and scrolls the window. |
|---|---|
| prevSlide() | Activates the previous slide and scrolls the window. |
| scrollToSlide($elem) |
Activates the selected slide and scrolls the window. The $elem parameter should be a jQuery-wrapped reference to the slide. |
| activateSlide($elem) |
Activates the selected slide withoutscrolling the window. The $elem parameter should be a jQuery-wrapped reference to the slide. |
Make a plugin with Fathom.js' events.
Any time a slide is activated or deactivated, the slide's element will trigger an event:
| activateslide.fathom | this refers to the slide being activated. |
|---|---|
| deactivateslide.fathom | this refers to the slide being deactivated. |
 JS Tutorial


