Download
User Rating: 0/5 ( 0 votes)
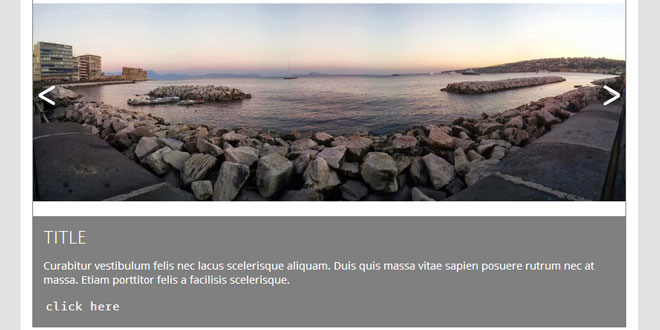
Ultimate Fade-in slideshow is a robust, cross browser fade in slideshow script that incorporates some of your most requested features all rolled into one. Each instance of a fade in slideshow on the page is completely independent of the other, with support for different features selectively enabled for each slideshow.
Features:
-
Sleek fade in effect that has the current image fading over the previous one.
-
Ability to display images either as an automatic or manual slideshow. In manual mode you define your own "prev/next" controls to let the user go through the slides.
-
In automatic mode, slideshow can be set to stop rotating after x cycles.
-
Responsive design- slideshow dimensions can now be set in percentage values to scale along with user's browser or mobile device screen size. New in v2.6
-
Each slide can be optionally hyperlinked.
-
Each slide can have an optional description associated with it. Descriptions can either be set to show on demand (when the mouse rolls over the slide), or be always visible until explicitly dismissed.
-
Persistence of last viewed slide supported, so when the user reloads the page, the slideshow resumes from the last slide.
-
Slideshow automatically pauses onMouseover.
-
Supports swipe to navigate in both desktop and touch enabled devices.
-
Supports the "oninit" and "onslide" event handlers to enhance customization of the slideshow.
Source: dynamicdrive.com
1. INCLUDE JS FILES
<script src="http://ajax.googleapis.com/ajax/libs/jquery/1.11.0/jquery.min.js"></script>
<!-- optional touchswipe file to enable swipping to navigate slideshow -->
<script type="text/javascript" src="jquery.touchSwipe.min.js"></script>
<script type="text/javascript" src="fadeslideshow.js">
2. HTML
<div id="fadeshow1"></div>
3. JAVASCRIPT
var mygallery=new fadeSlideShow({
	wrapperid: "fadeshow1", //ID of blank DIV on page to house Slideshow
	dimensions: [250, 180], //width/height of gallery in pixels. Should reflect dimensions of largest image
	imagearray: [
		["http://www.dynamicdrive.com/dynamicindex4/pool.jpg"],
		["http://www.dynamicdrive.com/dynamicindex4/cave.jpg"],
		["http://www.dynamicdrive.com/dynamicindex4/fruits.jpg"],
		["http://www.dynamicdrive.com/dynamicindex4/dog.jpg"] //<--no trailing comma after very last image element!
	],
	displaymode: {type:'auto', pause:2500, cycles:0, wraparound:false},
	persist: false, //remember last viewed slide and recall within same session?
	fadeduration: 500, //transition duration (milliseconds)
	descreveal: "always",
	togglerid: ""
});
4. OPTIONS
|
options |
Description |
|
wrapperid
Required
|
The ID of an empty DIV container on your page that will show the Fade In Slideshow. Such a DIV on the page may look like this:
<div id="fadeshow1"></div>
|
|
dimensions
Required
|
The dimensions of the slideshow in the format [width_int, height_int] with pixels being the assumed unit. These two values should be set to the dimensions of the largest image. Any image within the slideshow with width or height that exceeds the specified values will be clipped partially.
You can also set the dimensions to percentage values instead (wrap the values in quotations) to indicate you wish the slideshow to scale relative to its container. This sets the basis for a responsive slideshow, whereby the slideshow grows and shrinks based on the user's browser or mobile screen size.
The following shows some possible dimension values:
dimensions: [300, 200], // 300px by 200px
dimensions: ['90%', '80%'] // 90% by 80% of parent container size
dimensions: ['80%', 200] // 80% of parent container size by 200px
|
|
imagearray
Required
|
An array containing the images you wish to show. Each array element contains 4 parts:
["path_to_image", "optional_url", "optional_linktarget", "optional_description"]
Enter a blank string ("") for the optional parts you do not wish to define. Here's a complete example:
imagearray: [
["pool.jpg"],
["http://mysite.com/cave.jpg", "http://cnn.com"],
["fruits.jpg", "http://cnn.com", "_new"],
["dog.jpg", "", "", "This image has a description but no hyperlink"] //<--no trailing comma after very last image element!
],
Notice how there should be no comma trailing the very last element!
|
|
displaymode
Required
|
Sets the primary attributes of your slideshow, from whether this is an automatic or manual slideshow, the pause between slides, to the number of cycles before the slideshow stops in automatic mode. The syntax is:
displaymode: {type:'auto|manual', pause:milliseconds, cycles:0|integer, wraparound:true|false, randomize:true|false},
The "cycles" option when set to 0 will cause the slideshow to rotate perpetually in automatic mode, while any number larger than 0 means it will stop after x cycles.
The "warparound" option when set to false will disable the user's ability in manual mode to go past the very first and last slide when clicking on the navigation links to manually view the slides.
The "randomize" option when set to true will shuffle the display order of the images, so they appear in a different order each time the page is loaded.
In the following, the slideshow will auto run and stop after 3 complete cycles. Each time the page is reloaded, the order of the images randomly changes:
displaymode: {type:'auto', pause:3000, cycles:3, wraparound:true, randomize:true},
In the following, the slideshow will be put in manual mode, with the ability to loop back to the beginning of the slideshow disabled:
displaymode: {type:'manual', pause:2000, cycles:0, wraparound:false},
In manual mode, you must define your own "prev" and "next" controls to let the user control the slideshow. See "togglerid" option below for more info.
|
|
persist
Defaults to false
|
Boolean variable that decides whether the slideshow should remember and recall the last viewed slide within a browser session when the page is reloaded. |
|
fadeduration
Defaults to 500
|
The duration of the fade effect when transitioning from one image to the next, in milliseconds. |
|
descreveal
Defaults to "ondemand"
|
For a slideshow in which at least one image has a description associated with it, this option dictates the style of the Description Panel. The four possible values are:
-
"ondemand": Reveals the description when the user mouses over the slideshow, then hides it again when the mouse moves out.
-
"always": Shows a persistent description panel at the foot of the slideshow that can be dismissed by clicking on the "x" icon.
-
"peekaboo": (v2.4 feature). Reveals the description for each image automatically by sliding it in view each time, then hiding it again before the next image is shown. This setting is similar to "always" above, except the description isn't always visible, allowing viewers to see each image in its entirety momentarily.
-
"none": Explicitly disables the descriptions from showing. While not defining a description for any of your images inside the initialization code has a similar effect, this option is useful when you wish to define descriptions, but just not show them using one of the methods above, but rather, in combo with the onslide() event handler for example.
|
|
togglerid
Defaults to ""
|
Use this option if you wish to create navigational controls that allow the user to explicitly move back and forth between slides, whether the slideshow is in "auto" or "manual" mode. Set "togglerid" to the ID of another DIV on your page that will house the navigation controls for the slideshow, ie:
togglerid: "slideshowtoggler"
The DIV on the page with the corresponding ID attribute will be parsed by the script for links carrying a certain CSS class.
|
5. CREATING THE NAVIGATION LINKS
If you wish to create navigational controls that allow the user to explicitly move back and forth between slides, you need to manually define a DIV and create links inside it to act as "Prev" and "Next" buttons. Such a DIV looks like this:
<div id="slideshowtoggler">
<a href="#" class="prev"><img src="left.png" style="border-width:0" /></a> <span class="status" style="margin:0 50px; font-weight:bold"></span> <a href="#" class="next"><img src="right.png" style="border-width:0" /></a>
</div>
The ID attribute of this DIV (ie: "slideshowtoggler") should correspond to the value set inside the togglerid option of fadeSlideShow(options). Then, inside this DIV, simply create the desired links with one of the following two CSS class names to give it special meaning:
You can also display a status control anywhere inside this DIV showing the current slide being shown relative to the others (ie: 3/5) using a SPAN with the CSS class:
With that in mind, which links to show, how they are arranged, and how they are styled are all up to you.
 JS Tutorial


