- Overview
- Documents
Introduction
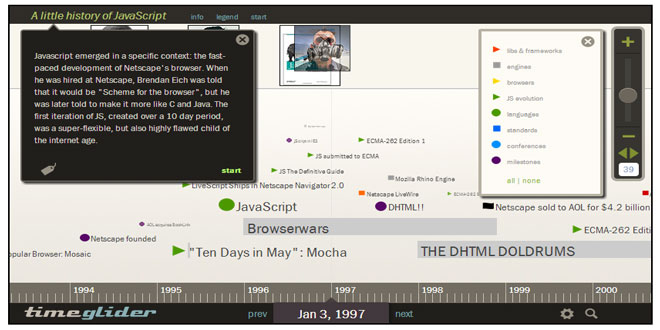
Timeglider JS is a zooming, panning data-driven timeline widget written in Javascript. This widget is the core of our our timeline authoring and publishing app, and can be integrated into any HTML application environment.
Timelines can be zoomed by dragging the vertical slider at right: up for zooming in (less time shown) and down for zooming out (more time shown). The mousewheel also works as a zoom controller. Any white area on the "stage" of the timeline can be dragged left and right, as can the blue "ruler" which marks out different units of time. Clicking on an event brings up a small modal window with a description and links if any are provided in the data.
A few bullets:
- Timeglider works well on iPads, but is not yet optimized for Android devices. We're working on a mobile list view for the phone-portrait experience.
- Data is imported into the widget with a straightforward JSON format, but data can also come from JavaScript objects (that you can create) existing on the page already.
- This code is not Open Source: Using the widget is free for non-commercial use; for commercial applications, we have a couple licensing options. If you plan to do a commercial implementation, you are welcome to experiment at locally or at test-scale.
- We no longer have our code on Github, and are going to do our best to provide complete code reference here on our site.
Installation & Options
Step 1: jQuery UI and Timeglider CSS Files
At the top of your document, in the <head> of the document, you'll need to include at least three CSS files, one which goes hand-in-hand with jQuery UI (for the visual styling of the widget), the other for the application-dependent styling and positioning for Timeglider's elements.
<link rel="stylesheet" href="css/jquery-ui-1.10.3.custom.css" type="text/css" charset="utf-8">
<link rel="stylesheet" href="timeglider/Timeglider.css" type="text/css" charset="utf-8">
<link rel="stylesheet" href="timeglider/timeglider.datepicker.css" type="text/css" charset="utf-8">
Step 2: jQuery (1.9.1)
Timeglider is essentially a jQuery plugin (actually a "widget", but we'll keep things simple). The newest version of Timeglider requires at least jQuery 1.9.1. You can download jQuery here.
<script src='/your_js_folder/jquery.js' type='text/javascript'>
Step 3: jQuery UI (1.10.x)
jQuery UI is a suite of jQuery-based interactive tools and effects based on the jQuery library. jQuery UI can be customized to include specific components; at a minimum, your jQuery UI needs to include these:
- all core modules
- interactions: draggable, droppable & resizable
- widgets: slider
- no effects are necessary
You can go to the jQuery UI site and create a build that meets these requirements as well as others you may need.
Every build of jQuery UI is different, and versions change frequently. We keep things simple by naming our jQuery UI file just "jquery-ui.js", but yours might be named according to your download and/or version.
*IMPORTANT: jQuery UI's position() api has changed as of 1.9, wherein the offset option is ending and offset parameters will be wrapped into the my and at options. If you're going to use a newer jQuery UI (1.9+), you'll see positioning problems (with modals, images) until we make a fix in our next version. See this note on the jQuery UI site.
<script src="js/jquery-ui.js" type="text/javascript" charset="utf-8"></script>
Step 4: Other JS Libraries
Timeglider relies on about eight additional libraries — especially Underscore and Backbone. We're working on reducing complete dependency on the others here, but for the meantime, here is what you'll also need prior to Timeglider's JS code. (These files are included in our zip folder of code!)
- Underscore
- Backbone
- Douglas Crockford's JSON shim, json2.js
- jQuery's template module
- Ben Alman's Tiny PubSub
- Brandon Aaron's jQuery Mousewheel plugin
- Stephen von Takach's iPad touch plugin
- jQuery's Globalize library
- Ben Alman's tiny debugger
Here is what these script tags look like:
	<script src="js/underscore-min.js" type="text/javascript" charset="utf-8"></script>
	<script src="js/backbone-min.js" type="text/javascript" charset="utf-8"></script>
    <script src="js/json2.js" type="text/javascript" charset="utf-8"></script>
	<script src="js/jquery.tmpl.js" type="text/javascript" charset="utf-8"></script>
	<script src="js/ba-tinyPubSub.js" type="text/javascript" charset="utf-8"></script>
	<script src="js/jquery.mousewheel.js" type="text/javascript" charset="utf-8"></script>
	<script src="js/jquery.ui.ipad.js" type="text/javascript" charset="utf-8"></script>
	<script src="js/globalize.js" type="text/javascript" charset="utf-8"></script>
	<script src="js/ba-debug.min.js" type="text/javascript" charset="utf-8"></script>
Step 5 JS: Timeglider
Timeglider is made of six separate component-files, all of which are required. The overall pattern can be roughly understood as "model-view-mediator" (as opposed to model-view-controller). Backbone.js is used to structure Timeglider's main data models ("TG_Timeline" and "TG_Event"). Timeglider's "mediator" is a controller that keeps track of, and triggers events to effect, state changes using pub-sub. The view is where all DOM relations, html, and jQuery/JS related handlers are contained. TG_Org is a sub-library of the view that determines HTML of the self-organizing timeline-events, and TG_Date is where all the complex date-related functions are kept. Finally, the ...widget.js file is the interface for turning all the other logic into a jQuery plugin-like structure, and exposes public methods.
Here are the Timeglider-related script tags:
	<script src="timeglider/TG_Date.js" type="text/javascript" charset="utf-8"></script>
	<script src="timeglider/TG_Org.js" type="text/javascript" charset="utf-8"></script>
	<script src="timeglider/TG_Timeline.js" type="text/javascript" charset="utf-8"></script>
	<script src="timeglider/TG_TimelineView.js" type="text/javascript" charset="utf-8"></script>
	<script src="timeglider/TG_Mediator.js" type="text/javascript" charset="utf-8"></script>
	<script src="timeglider/timeglider.timeline.widget.js" type="text/javascript" charset="utf-8"></script>

    <script src="timeglider/timeglider.datepicker.js" type="text/javascript" charset="utf-8"></script>
Alternately, you can use the minified version of all of the above:
<script src="timeglider-1.0.1.min.js" type="text/javascript" charset="utf-8"></script>
Step 6: The plugin/widget code
If you've worked with jQuery plugins before, installing timeglider will feel familiar. The main difference is that, rather than being a "plugin", Timeglider uses jQuery's Widget Factory to create a "stateful" plugin. Among other things, the Widget Factory has a more comprehensive interface for exposing methods. Here's what the code from the demo looks like:
<!-- html: -->
   <div id='placement'></div>

<!-- js: -->
   $(document).ready(function () {
      var tg1 = $("#placement").timeline({
         "data_source":"json_tests/js_history.json",
         "min_zoom":15,
         "max_zoom":60,
     });
   });
Options
Options are the elements of the widget plugin Javascript highlighted above. They are name-value pair attributes provided in the object-type argument of the plugin. The only required option is "data_source".
A URL pointing to a JSON file with timeline data. Since we're still using JSON (rather than JSONP), data needs to be in the same domain as the widget. See the JSON page for more into on how to structure data.
Data can also be imported directly from an HTML table that's on the page, which will then be hidden, an opportunity for "progressive enhancement". See table.html to see how this is done.
or
{type:"checkboxes"}
 JS Tutorial


