- Overview
- Documents
Full Page Image slideshow
Description: They do say bigger is better, right? This is a supersized slideshow that automatically expands to fill up the container it's in to let you display a slideshow that either covers the entire visible screen, or a certain section inside the page. Each image is randomly panned, zoomed in or out to add flare, with an optional caption and persistent description also supported. Set the slideshow to stop after x cycles or run continuously, execute custom code after each image change, etc. This slideshow also has a giant list of supported browsers: IE9+, all modern versions of FF, Chrome and Safari, and mondern Android and iPhone devices.
Step 1: This script accesses the following external files which you need to upload to your server. Download them below (right click, and select "Save As"):
- jquery-slider.js (main .js file)
- smooth_slider.css (main .css file)
- playlist.json
- images.zip (zip file containing the sample images used. Unzip to where your slideshow page is).
Step 2: Insert the following code into the <head> section of your page:
<link rel="stylesheet" type="text/css" href="smooth_slider.css">

	<style>

	.slideshowwrapper{ /* dimensions of outermost slideshow container */
		width: 80%;
		height: 600px;
		position: relative;
		overflow: hidden;
	}

	</style>

	<script src="http://ajax.googleapis.com/ajax/libs/jquery/1.10.2/jquery.min.js"></script>
	<script src="jquery-slider.js">

		/***********************************************
		* Full Page Slideshow- (c) Dynamic Drive DHTML code library (www.dynamicdrive.com)
		* This notice MUST stay intact for legal use
		* Visit Dynamic Drive at http://www.dynamicdrive.com/ for this script and 100s more
		***********************************************/

	</script>
	<script>
		$(function() {
			$('#resume').on('click', function(){ // set up resume button behavior
				$("#pan_area").smoothslider("resume") // resume playing of this slideshow. Pass in "pause" to pause it instead
				$(this).hide() // hide resume button
			})


			$("#pan_area").smoothslider("install", {
				"playlist_url":"playlist.json", // get the playlist and some config from the server

				// this function gets called whenever there's an image change
				"on_image_change":function(caption, image_url) {
						var area= $("#img_msg_area").find("span");
						area.animate({"opacity": 0}, 500, "swing", function() {
							area.text(caption);
							area.animate({"opacity": 1}, 500); // fade in & out take 500ms each
						});
					},
				"loops": 2, // number of loops before stopping. Remove thisoption to run continuously
				"throbber":$("#throbber"), // an image to show when waiting for images to load
				on_pause:function(){
					$('#resume').show()
				}

			});
		});

	</script>
Step 3: Add the below sample icon menu code to the BODY section of your page:
<div class="slideshowwrapper">
	<div id="throbber"><img src="img/throbber.gif"></div>
	<div id="resume" style="display:none">Replay</div>
	<div id="pan_area"></div>
	<div id="img_msg_area"><span></span></div>
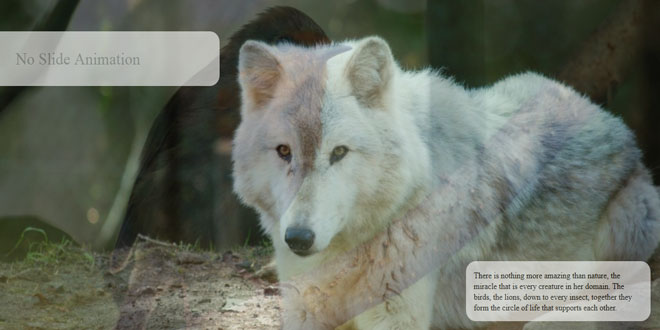
	<div id="static_text_area">There is nothing more amazing than nature, the miracle that is every creature in her domain. The birds, the lions, down to every insect, together they form the circle of life that supports each other.</div>
</div>
Well, that's it for installation. Read on for more details on setting up Full Page Slideshow.
 Setting up Full Page Slideshow
The default HTML markup of a Full Page Slideshow looks like the following:
<div class="slideshowcontainer" >
<div id="throbber"><img src="img/throbber.gif"></div>
<div id="resume" style="display:none">Replay</div>
<div id="pan_area"></div>
<div id="img_msg_area" class=""><span></span></div>
<div id="static_text_area">There is nothing more amazing than nature, the miracle that is every creature in her domain. The birds, the lions, down to every insect, together they form the circle of life that supports each other.</div>
</div>
The parent DIV in red creates a slideshow that spans the dimensions of this DIV, versus a true full page slideshow that spans the entire screen (more on how to do the later in a moment). Five components of the slideshow are the "throbber" loading gif DIV, a "resume" button DIV, the main image "pan_area", the caption "img_msg_area" DIV, and finally, a non changing description "static_text_area" DIV. The IDs of these components can all be changed, with all but the "throbber" and "pan_area" DIVs themselves even being optional.
As mentioned, the default markup above creates a slideshow that only expands to the size of the parent container (in red above). This is probably the most common set up, whereby you wish to display a large slideshow on a page with other content. The size of this container can easily be set using CSS:
<style>
.slideshowwrapper{ /* dimensions of outermost slideshow container */
width: 80%;
height: 600px;
position: relative;
overflow: hidden;
}
</style>
Take a look at demo1.htm for an example of this.
Creating a slideshow that spans the entire screen
If you wish your slideshow to span the entire screen- meaning the slideshow is the only content on your page- the differences in markup from the default set up above are as follows. Firstly, for the HTML, it should NOT contain a parent container other than the BODY element itself:
<body>
<div id="throbber"><img src="img/throbber.gif"></div>
<div id="resume" style="display:none">Replay</div>
<div id="pan_area" style="height:100%"></div>
<div id="img_msg_area"><span></span></div>
<div id="static_text_area">There is nothing more amazing than nature, the miracle that is every creature in her domain. The birds, the lions, down to every insect, together they form the circle of life that supports each other.</div>
</body>
Notice the absence of the outermost slideshowwrapper DIV. For such a setup, you also need to include the following CSS in the HEAD section to properly set the document's dimensions and remove any padding/margins:
<style>
html,body { /* For full page slideshow that spans entire page (with no other content), the below CSS is needed */
height:100%;
padding:0px;
margin:0px;
}
</style>
And that's it. See demo2.htm or demo3.htm for examples of true full page slideshows.
Having understood how the markup for Full Page Slideshow works, lets move on to the initialization code, which should be called in the HEAD section of your page to jump start the slideshow.
Calling smoothslider() initialization code
Call smoothslider() on the image component of your slideshow markup to initialize it:
$("#pan_area").smoothslider("install", {
  //options here...
})
Notice the element smoothslider() should be called on- the #pan_area element- which corresponds to the image container in the slideshow markup we saw earlier. The function should be passed two parameters, the string "install", followed by a list options, for example:
$("#pan_area").smoothslider("install", {
  "playlist_url":"playlist.json", // get the playlist and some config from the server
  "loops": 2, // number of loops before stopping. Remove thisoption to run continuously
  "throbber":$("#throbber") // an image to show when waiting for images to load
})
Each option should be separated by a comma, except the very last option defined. The following lists all the available options in detail:
| options | Description |
|
preload_images: int
Defaults to -1 |
Sets whether slideshow should start after all images have been preloaded. Defaults to -1, which means "yes". Any other integer causes slideshow to start immediately, with images loading concurrently. |
|
playlist: []
Defaults to null |
An array holding the list of images you wish to show, plus optional caption and desired transition effect for each image. The syntax is:
"playlist":[
 {"url":"path to image 1",
 "caption":"optional caption",
 "slide: {optional specific transition setting to show}
 },

 {"url":"path to image 2",
 "caption":"optional caption",
 "slide: {optional specific transition setting to show}
 }
]
The "caption" and "slide" settings for each image are both optional; if not defined that slide simply will show no caption and use a random transition effect. The following shows how your playlist may be populated:
"playlist":[
 {"url":"img/img0.jpg",
 "caption":"Zoom 1n",
 "slide":{"z1":1, "z2":1.5}}, // zoom in (magnification from 1 to 1.5)

 {"url":"img/img1.jpg",
 "caption":"Zoom Out",
 "slide":{"z1":2, "z2":1}}, // zoom out

 {"url":"img/img2.jpg",
 "caption":"Pan up",
 "slide":{"y1":0, "y2":200}}, // pan up

 {"url":"img/img3.jpg",
 "caption": "Pan left",
 "slide":{"x1":0, "x2":20, "z1":1}}, // pan left

 {"url":"img/img4.jpg", "caption":"No Slide Animation","slide":{}} // no slide
],
demo3.htm makes use of the playlist[] option to define the images, instead of the playlist_url option below. |
|
playlist_url: "path_to_json_file"
Defaults to null |
This option serves as an alternative way from the above for defining your images (and some other options), inside an external .json file on your server and fetched by the slideshow using Ajax. Point "playlist_url" to where that .json file is located on your server:
"playlist_url": "playlist.json" "playlist.json" should contain a JSON object with the "playlist" option inside it:
{
 "playlist": [
  {
  "url": "img/img0.jpg",
  "caption": "Any caption here..."
  },
  {
  "url": "img/img1.jpg",
  "caption": "A cheetah"
  },
  {
  "url": "img/img2.jpg",
  "caption": "A sand cat kitten"
  },
  {
  "url": "img/img3.jpg",
  "caption": "Now some tigers"
  }
 ],

 "hold_time":5,
 "loops":2,
 "transition_time":1
}
The JSON object can also carry some other options normally defined inline on the page, specifically: "preload_images", "anim_fps", "transition_time", "hold_time", and "loops". |
|
loops: int
Defaults to null |
The number of loops the slideshow should cycle through before stopping, such as 2 for 2 iterations. Defaults to null, meaning the slideshow will loop continuously. |
|
throbber: element
Defaults to null |
A jQuery reference to the element on the page containing an animated gif to show while the slideshow is loading. For example, you might define the following markup on your page as the "throbber" element:
<div id="throbber"><img src="img/throbber.gif"></div> The throbber option would then be set to the following to reference it:
"throbber":$("#throbber")
|
|
anim_fps
Defaults to 20 |
Sets the frames per second of the transition animation. |
|
transition_time
Defaults to 2 |
Sets the duration of the transition, in seconds. |
|
hold_time
Defaults to 4 |
Sets the duration of the pause between image changes, in seconds. |
|
on_image_change: function(caption, image_url){...}
Defaults to null |
Callback function that gets invoked after each image change. By default the slideshow uses it to fade out then in the caption area with the current caption text:
"on_image_change":function(caption, image_url) {
 var area= $("#img_msg_area").find("span");
 area.animate({"opacity": 0}, 500, "swing", function() {
  area.text(caption);
  area.animate({"opacity": 1}, 500); // fade in & out take 500ms each
 });
}
This function is fed two parameters each time it's called- the caption of the current image (if any), and the image's URL. |
|
on_images_loaded: function(){...}
Defaults to null |
Callback function that gets invoked when all images have preloaded and slideshow has started. |
|
on_pause: function(){...}
Defaults to null |
Callback function that gets invoked when the slideshow is paused. This can happen either manually, when the pause function is called to pause the slideshow, or automatically, when the "loops" option above is defined and the slideshow has completed the last iteration.
One use of the "on_pause" option is to show a "resume" button once the slideshow is paused to allow the user to resume playing it. |
|
on_resume: function(){...}
Defaults to null
|
Callback function that gets invoked when the slideshow has resumed playing after being paused. To resume playing a slideshow after it's paused, call the "resume" method. |
Manually pausing/ resuming a slideshow
Once a slideshow has initialized, there are two ways it can pause- first is automatically if the "loops" option is set to an integer, and second is if you manually pause it. The later can be accomplished by calling smoothslider() again on the image container, but with the keyword "pause" as the first parameter:
$("#pan_area").smoothslider("pause")
Notice how the 2nd parameter isn't defined at all. To manually resume the slideshow, call the same code with the keyword "resume" instead:
$("#pan_area").smoothslider("resume")
The above lines should be called inside your own code whenever you wish to pause/ resume the slideshow. For example, the following creates a "pause" link:
<a href="#" onClick="javascript:$('#pan_area').smoothslider('pause')">Pause Slideshow</a>
Manually configuring the transition effect for a particular slide
By default the transition applied to each image is done automatically and randomly by the script, panning and zooming as it sees fit based on the available image size. You can override this with the transition pattern of your choice based on four variables- "x1", "x2", "y1", "y2", "z1", and "z2". To manually set the transition for a particular slide, make use of the "
slide" option when defining your images inside "playlist[]":

"playlist":[
{"url":"img/img0.jpg",
"caption":"Zoom 1n",
"slide":{"z1":1, "z2":1.5}}, // zoom in (magnification from 1 to 1.5)

{"url":"img/img1.jpg",
"caption":"Zoom Out",
"slide":{"z1":2, "z2":1}}, // zoom out

{"url":"img/img2.jpg",
"caption":"Pan up",
"slide":{"y1":0, "y2":200}}, // pan up

{"url":"img/img3.jpg",
"caption": "Pan left",
"slide":{"x1":0, "x2":20, "z1":1}}, // pan left

{"url":"img/img4.jpg", "caption":"No Slide Animation","slide":{}} // no slide
],
The "x" and "y" variables specify horizontal and vertical movements respectively, where 0 is default image position, and an integer larger than 0 moves the image either right or up. The "z" variables specify zoom (integer greater than 0). If the slide option is set to an empty set {}, then no transition will be added to this image (unlike the default setting, which is a random transition).
Manually configuring the transition may not always produce the effect you intended. Certain settings that force the image to have to be enlarged beyond a reasonable degree if implemented are aborted, such as panning the image to the right all the way by 300px: "slide":{"x1":0, "x2":300} This setting in order for it to be adopted while ensuring the image still spans the entire container it's in means the image would have to be scaled up excessively.
 JS Tutorial


